6-Step Guide to Starting your Edition
Table of Contents
Step 1: Create a GitHub account
Step 2: Create Template Edition
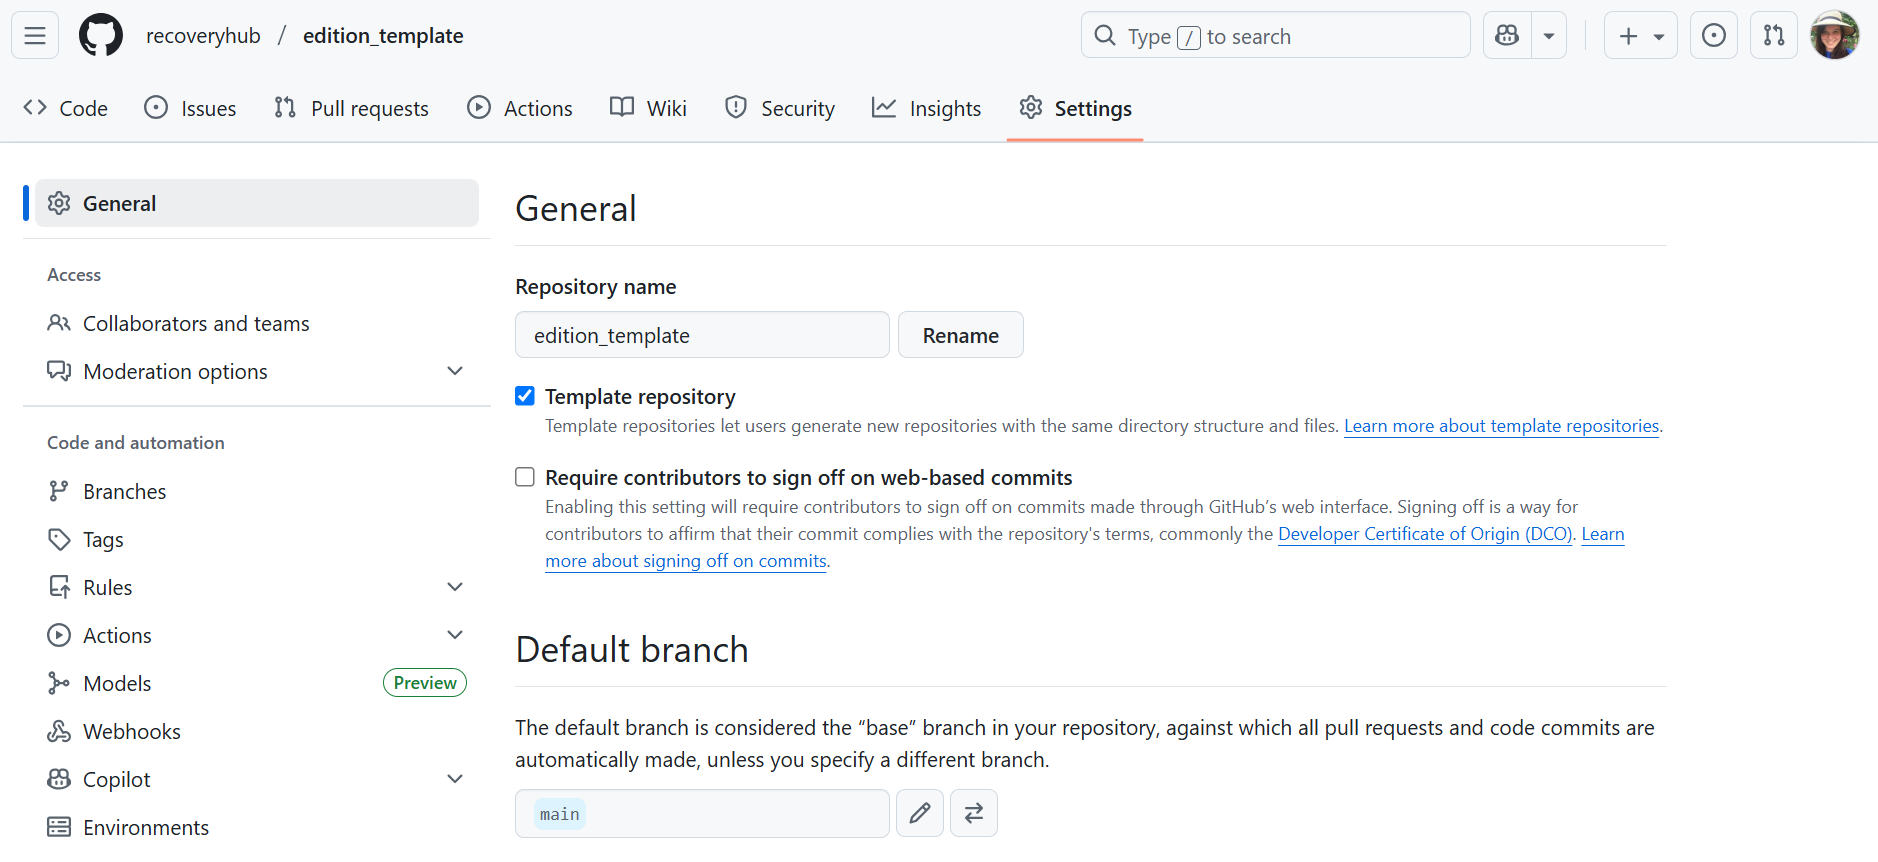
Step 3: GitHub Repository Setting Recommendations
Step 4: Configuring Your Edition Site
Step 5: Publishing Your Edition Site
Step 6: Adding Content to Your Site
Additional Considerations
Naming Your Project
Folder Structure & Organization
Transcribing & Editing
Troubleshooting
Step 1: Create a GitHub Account
GitHub is a free, open-access resource that stores files that can run a website; it can also host that website thanks to a feature called GitHub pages.
If you do not have a GitHub account, follow the instructions on GitHub to create one.
Step 2: Create a Template Edition
To get started with your own edition, you’ll need to create a GitHub repository for your project using our Recovery Hub edition template. (The repository is the folder that stores all of the code for a given project.)
First, visit the Recovery Hub’s repository home page.
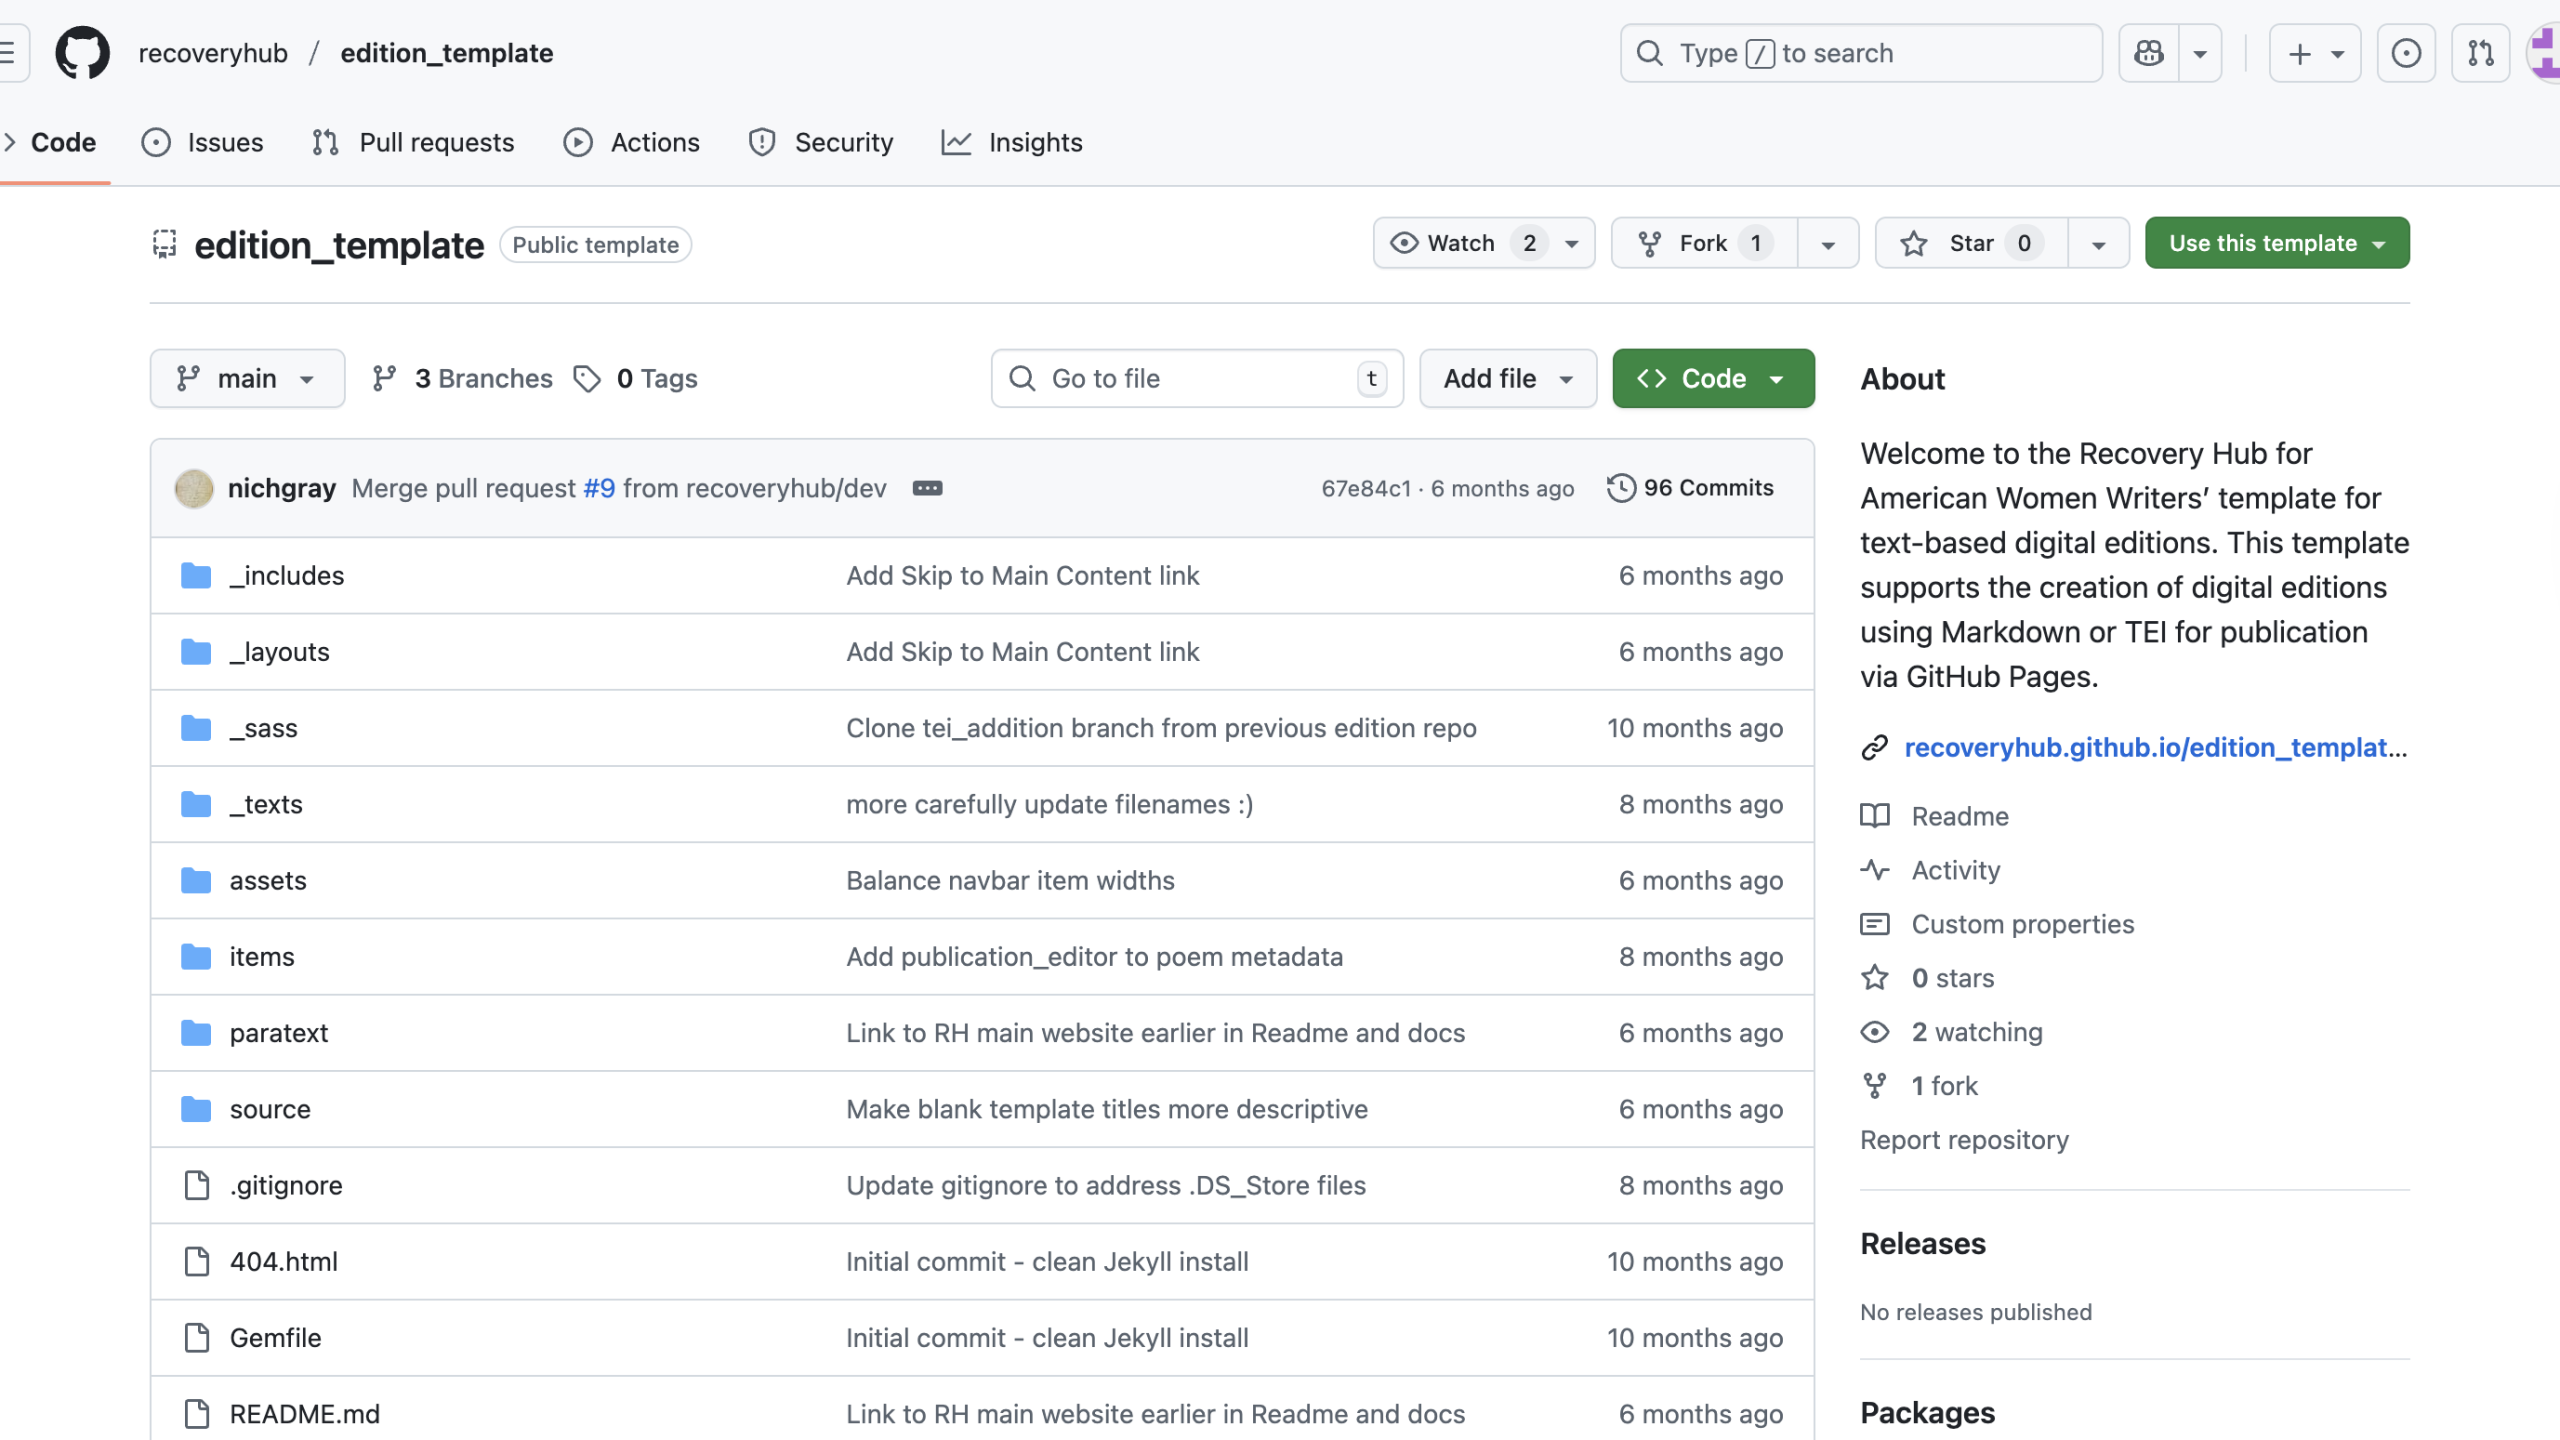
Click the “Use this template” button at the top-right of the repository homepage, then select “Create a new repository” to copy it to your GitHub account.
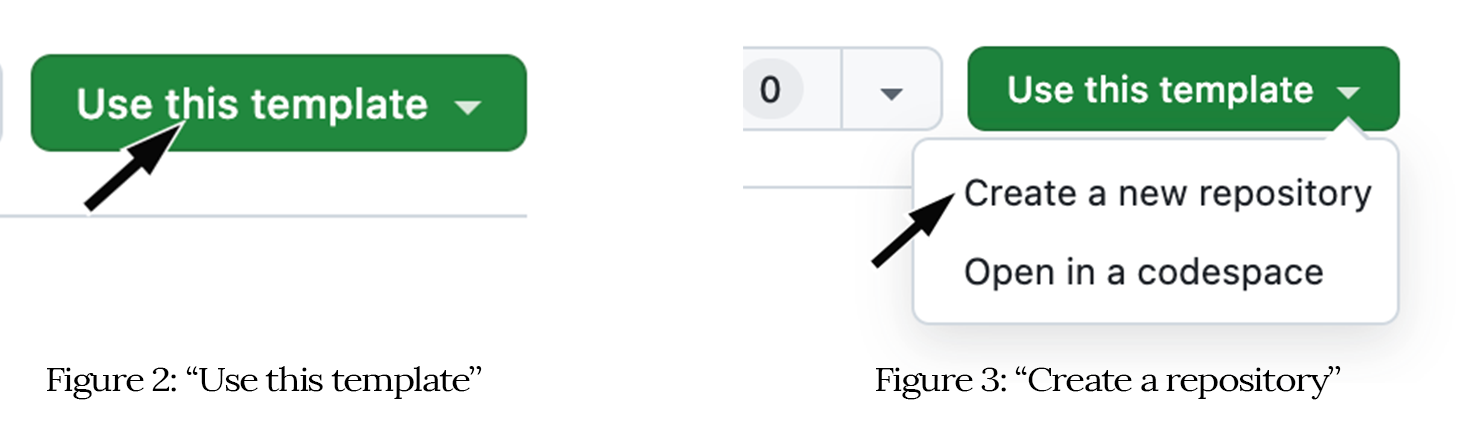
After clicking on “Create a new repository,” GitHub will immediately take you to a page to set initial settings for your new repository. See Step 3 for our setting suggestions.
Step 3: GitHub Repository Setting Recommendations
On the “Create a new repository” page, you will be asked to choose your preferred repository settings. Below, we list the setting fields GitHub offers when creating a new repository along with our recommendations for each:
Start with a template: recoveryhub/edition_template

Include all branches: Off

Owner: Keep your personal account selected unless your edition belongs to a specific GitHub organization.

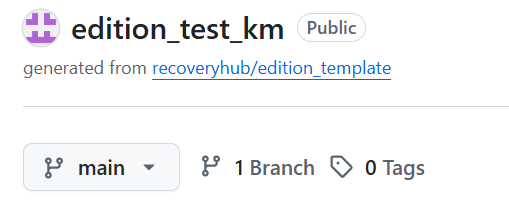
Repository Name: Pick a name that is short but memorable (e.g., edition_test_km)

NoteRepository names cannot contain spaces, so we recommend using underscores in place of the spaces (e.g., edition_test_km). See Naming Your Project for more.
Description: Optional. You can always add or change later.

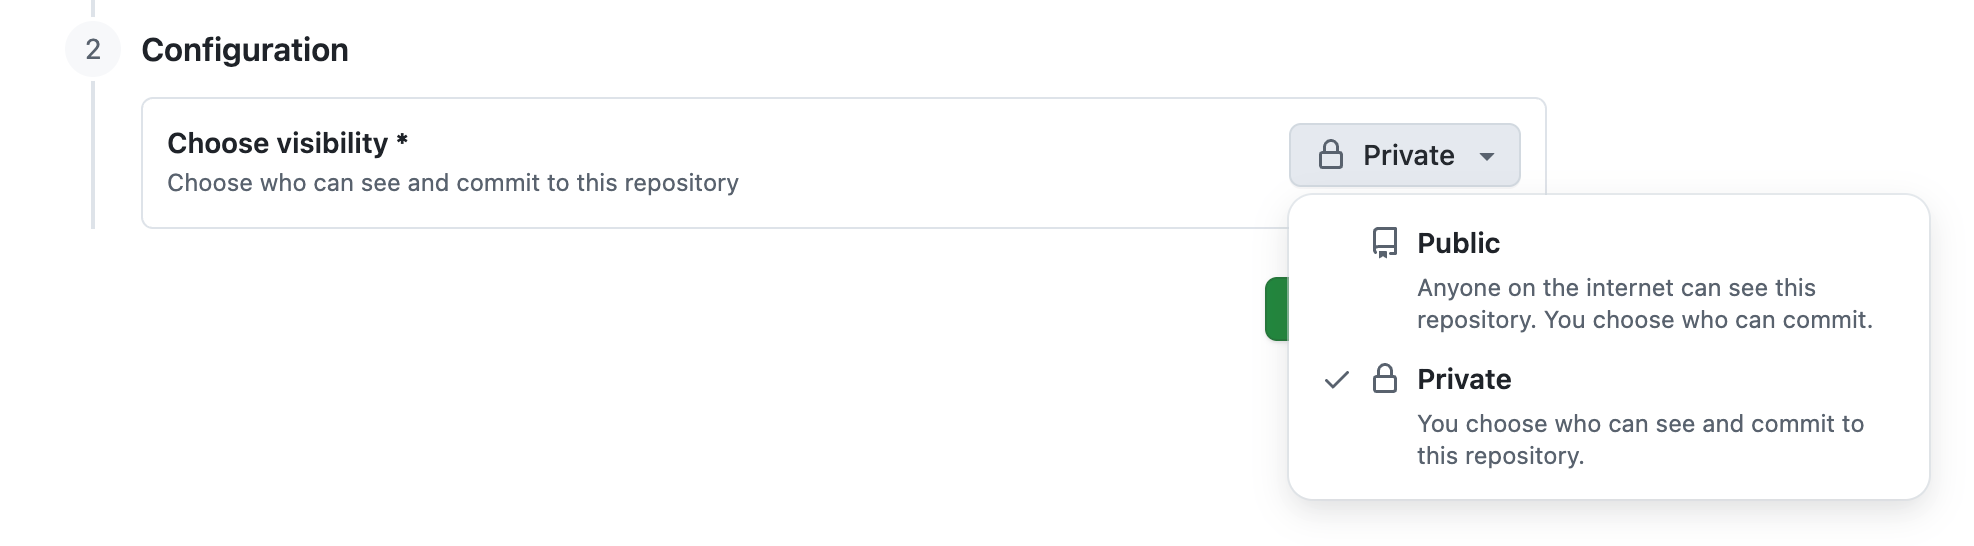
Visibility: It’s up to you. Either way, people will not be able to make changes without your approval.
Private: Many people prefer to keep their repository private until the release is ready. If the repository is private, only the members you add will be able to see that it exists. To learn more about adding members, see inviting collaborators to a personal repository in GitHub’s documentation.
Public: To publish your edition with GitHub Pages, your visibility settings must be set to Public, which can be changed at any time. Refer to Step 5 for instructions on updating visibility settings at a later time.
Once you’ve entered your initial settings, click “create repository” at the bottom of the page.
It will take a few moments to set up your new repository. After it’s created, GitHub will automatically redirect you to your repository’s home page.
Note: Your repository home page is what GitHub calls your repository’s “main branch.” The main branch is the primary and definitive version of the project’s code, where you organize and store all your folders and files. In Figure 5, you’ll see it’s set as your repository’s default.
Step 4: Configuring Your Edition Site
The Recovery Hub template allows you to customize your edition by making changes (editing settings) in the _config.yml file.
The _config.yml file contains settings that affect your whole site. Listed below are the settings you will need to edit, along with instructions on how to modify them for your edition site. You will only need to do this once; rarely will you need to make any edits afterward.
How do I Make Changes?
The following step-by-step instructions for changing the _config.yml file apply to all files in your GitHub repository.
Locate and open the file that you need to edit in your repository’s main branch: _config.yml
Next, to make a change, switch to “edit” mode by clicking the pencil icon in the top-right corner of the file. You will not be able to make any changes if you are not in edit mode.

After you’ve made your changes, you can either “cancel” or “commit” to them. If you “cancel changes,” your edits will not be applied. Choose “commit changes” to confirm them.
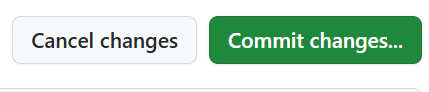
Before you can commit your changes, GitHub will present you with the option to keep the default or revise the commit message. This required field serves as a brief, descriptive record of the changes made in a file. The Git commit message is a crucial part of version control, providing context and a history of code modifications for you and anyone else with access to the repository. Providing an “extended description” is optional.
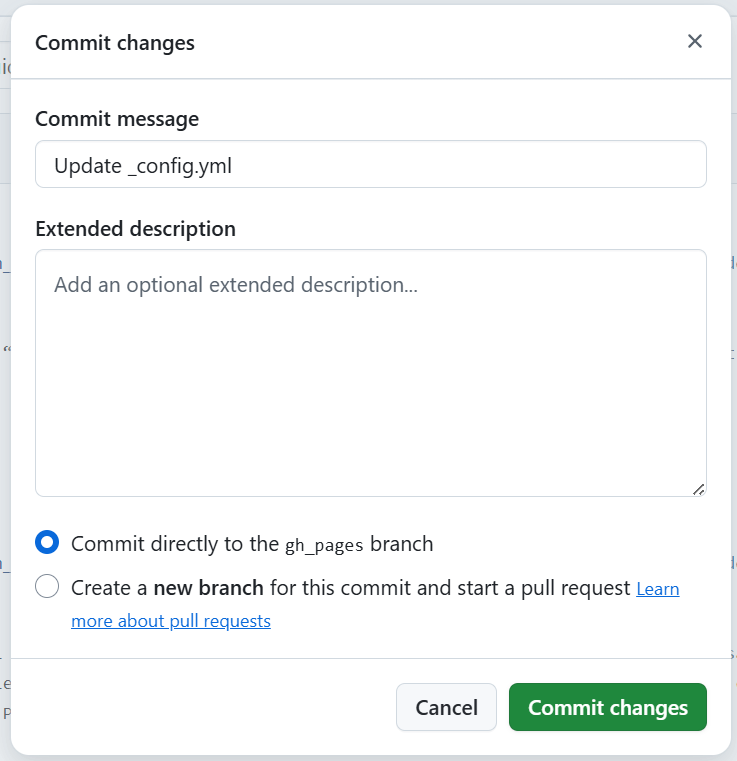
Click “commit changes” to update your file.
Now that you know how to make and commit changes to your files, let’s walk through how to update your URL and BaseURL and how to customize your edition site!
Change URL and Base URL
To change the URL and base URL for your edition, locate and open the _config.yml file in the main branch of your edition’s repository.
The base URL metadata element can be found on line 40; the URL metadata element can be found on line 41.
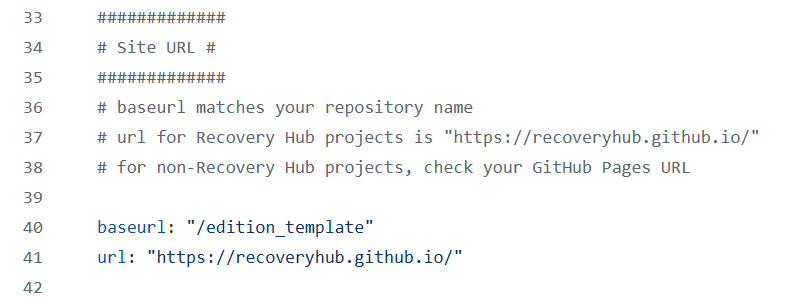
After you switch to edit mode, scroll down to update your URLs, replacing “edition_template” in the base URL with your edition’s repository name and replacing “recoveryhub” in the URL with your GitHub username. See formulas and examples below:
URL Formula:
https:// + GitHub username + . + github.io + /
Example:
https://KezMill.github.io/
Base URL Formula:
/edition repository name
Example:
/edition_test_km
Customizing Edition: Updating Settings in _config.yml
If you haven’t already, locate and open the _config.yml file in the main branch of your edition’s repository.
Read through the file to familiarize yourself. The lines starting with a # indicate our detailed explanations of each setting and its function. Text after a # does not appear on the published site; we recommend keeping these lines to prevent confusion if you need to make changes later.
You will add metadata to each element listed in the file, see Fig. 7 below:
To edit and add your metadata, click the pencil icon in the top right corner and, from top to bottom, edit elements found under each section:
Metadata
Site Information Metadata
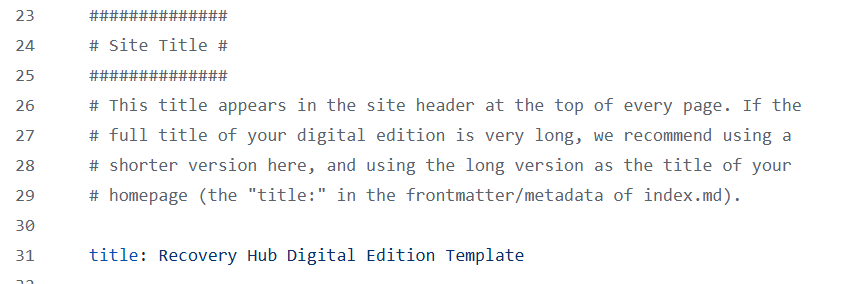
Title: This should match your project’s long name, the full title of your published edition.
URL and base URL: Both must match your published site (see above for instructions).
Description: This is a paragraph-length description that appears in the site’s footer.
Navigation Metadata
Header pages: These are the links the appear in the navigation menu.
Banner Metadata
Banner image: The image used for your site’s banner.
Banner alt text: The short descriptive text that provides an accessible alternative to the visual content,
Banner size: Where you customize the size of your banner image.
Contact Information Metadata
Editor: This element is a defult for all pages that lists the edition’s editors as most or all pages will have the same editor(s).
Contact information: The edition’s contact information that appears in the site’s footer (name, email, institution, GitHub username, social media usernames,etc.)
There is also the ability to update metadata in the list of categories/genres up for the texts in your edition.
Usually, you won’t need to change anything at the bottom of the file under “Other Settings.”
TEI Configuration
To configure the display of TEI files, you should make sure the categories referenced in your TEI have been added to the category_list and that the following is included under defaults:
# Text (TEI)
  - scope:
      path: "_texts"
      type: texts
    values:
      layout: tei
TEI uses Jekyll collections, so you should also include:
# To use Jekyll collections, set them up here:
collections:
  texts:
    output: true
These sections have been added to the default _config.yml file for reference and can be removed from the file for editions that do not include TEI files.
Step 5: Publishing Your Edition Site
To publish your project edition site with GitHub pages, click “Settings” at the top of your edition’s repository home page. This will direct you to the setting’s “General” page.
Before you continue, your repository must be public before it can be published with GitHub Pages.
If your repository is already public, click here to jump ahead.
If your repository is currently private, follow the steps below to make it public.
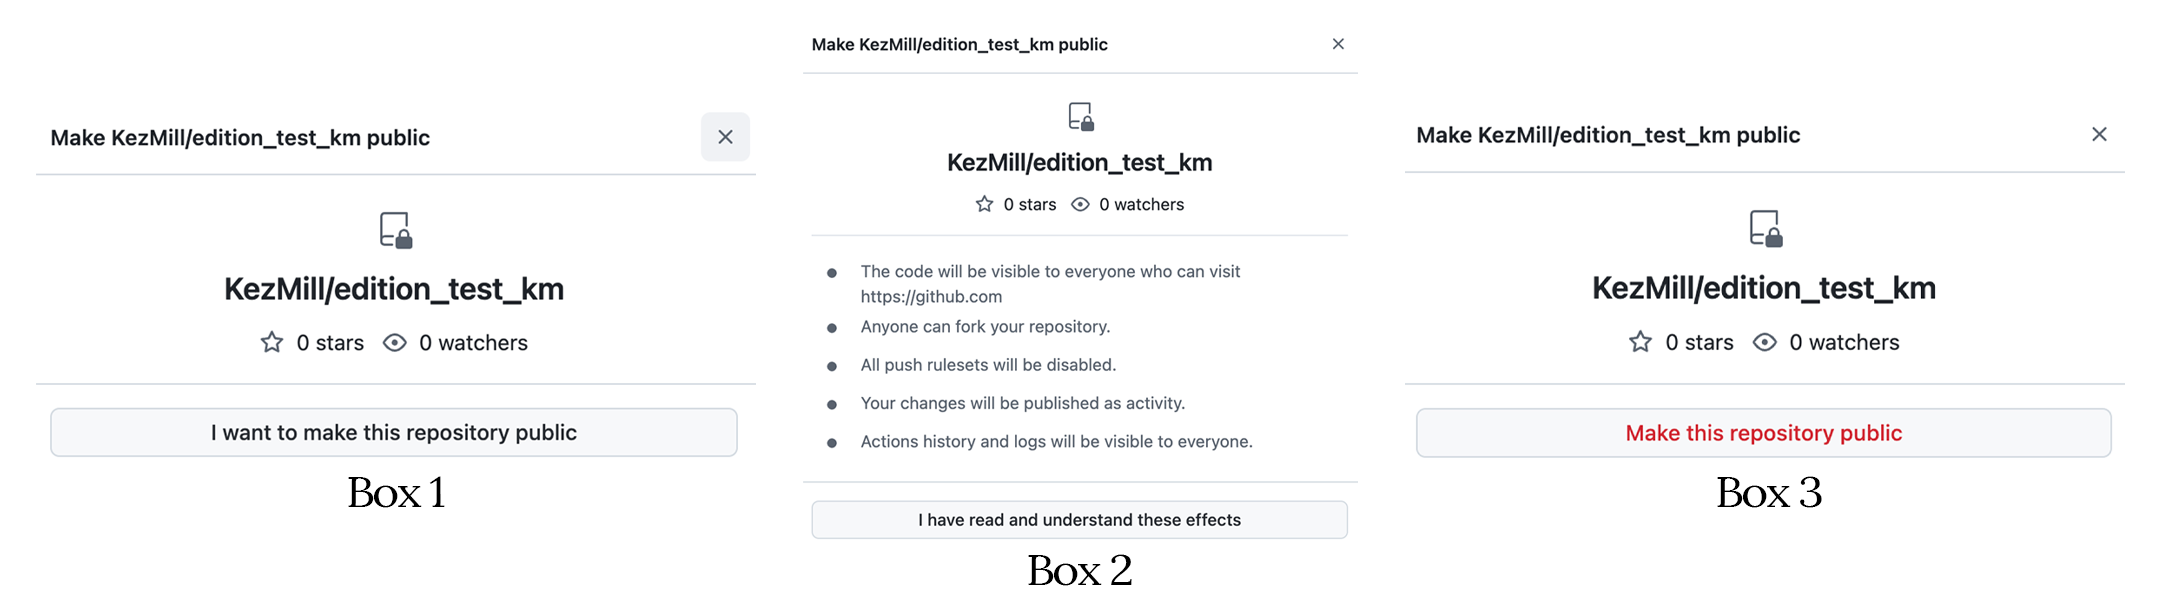
Update Privacy Settings: Private to Public
On the setting’s general page, scroll down till you reach “Danger Zone” and click “Change Visibility,” changing to public.

Click “I want to make this repository public” on the first pop up box.
Click “I have read and understand these effects” on the second pop up box.
Click “Make this repository public” on the last pop up box that appears.
After your repository has been made public, the page will reload and take you back to the top of the setting’s general page. Stay on this page and follow the directions below on how to publish your repository.
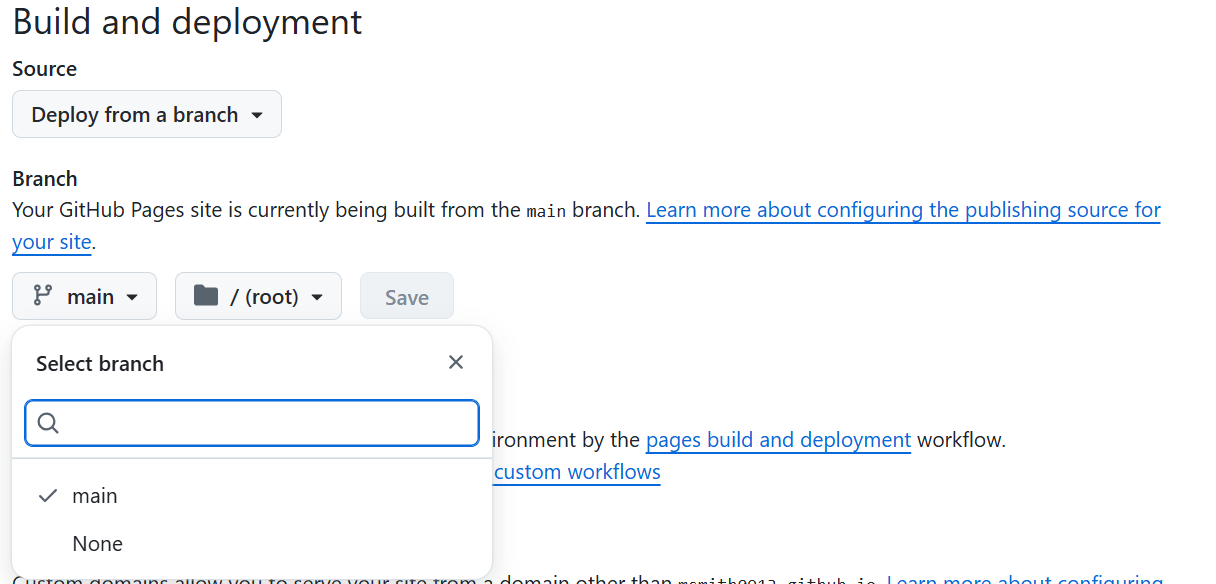
Publishing Your Edition Site with GitHub Pages
To publish your site with GitHub Pages, find the “Pages” section in the left-hand menu of the Settings page. Click the box that says “None” and select “Main” instead. Click “Save.”
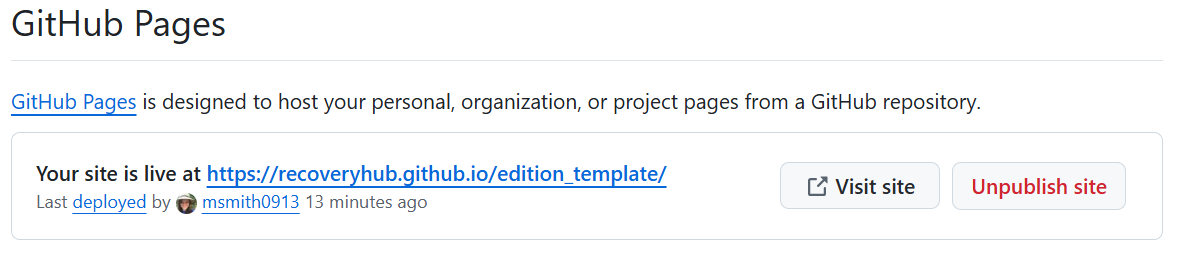
Your site will take several minutes to publish. Once it has completed the deployment process, you’ll find your link both in the Pages settings page.
Step 6: Adding Content to Your Site
Home Page Configuration
To edit the home page of your site, you’ll need to edit the index.md and potentially make some changes in _config.yml, if you haven’t already. Instructions are provided in both files.
About Page Configuration
To edit the About page, make changes to the about.md file found in the main branch of your repository. If you don’t want to have an About page, delete that file instead.
Adding New Pages
You can add new pages to your site by creating new Markdown (.md) files.
Note: A page is a file. On your published site, the file functions as a web page.
For step-by-step instructions on how to add a new page, refer to our guide under Additional Considerations
Note: A new page with additional information about your project can be stored in the main branch of your repository alongside index.md and about.md. If it’s a page about the texts in the edition, you may store it in your paratext folder instead.
Additional Considerations
Naming Your Project
Your project will use three types of naming conventions: a long name, a short name, and an edition prefix.
long name: The project’s full edition title (e.g., Mary Johnston’s The Wanderers: A Digital Edition).
short name: The name for your edition’s GitHub repository.
Note: The repository name can only contain upper and lowercase letters and underscores ( _ ). We recommend choosing two or three key words from your edition’s long name and using underscores where there would generally be spaces (e.g., johnston_wanderers).
edition prefix: A brief unique identifier that precedes file names for your edition, which should be included every time you create and name a file.
Keep the prefix name basic and limited to five characters (numbers or letters) or fewer; it can indicate the edition’s version or reflect the project’s name. However you choose to name your files, keep names consistent and clear. See below for our recommended file naming formula:
edition prefix + _ + padded number + . + file extension
Examples
testkm_00001.md
testkm_00012.xml
testkm_logo_00003.png
Note: We recommend a five digit length for padded number as it allows you to have 99,999 files correctly ordered when sorted by name. It does not matter what number’s you choose for each file name, they just must all be unique. See our Transcription Guide for additional file naming formulas.
Folder Structure and Organization
There are several main folders and subfolders you will primarily use. These folders will store various files, including but not limited to your documents, Markdown transcriptions, images, and more.
In list form, using our color-coded folder paths, we explain what each folder contains, providing additional information as needed.
paratext: docs and essays subfolders
paratext/docs: documentation materials
paratext/essays: essays and other paratext that accompany your edition
items: ready-to-publish Markdown transcriptions. You will upload Markdown-encoded documents (.md files) here manually.
Note: If you are working with multiple genres, use the subfolders in items to organize your files by genre. The sample files in the template are organized by books, periodicals, and poems.
source: Markdown drafts, TEI drafts, Markdown sample files for built-in genres, and Ruby script
source/drafts: Markdown drafts and TEI drafts
Note: Your drafts folder can be (re)organized to your liking. However, we recommend organizing them by file type (e.g. markdown or tei) as they are in this sample. You can choose to edit your transcriptions directly on GitHub in the drafts folder to create a version history, but this isn’t necessary! If you do, you will need to copy them over to the ready-to-publish items folder.
source/drafts/markdown: blank sample files for each of the built-in genres (books, periodicals, and poems), which include all the hard-coded metadata fields ready for you to fill in.
source/tei: your ready-to-publish TEI-encoded documents (.xml files).
texts: Markdown files that correspond to your TEI files.
assets/images: home page banner image, site footer logos or marks, TEI-based page images
Note: To replace the home page banner image with a custom banner image, follow the instructions in Step 4.
assets/images/tei: if you are using TEI and would like to include page images as part of your edition, add the image files to this folder.
Other folders beginning with an underscore (_includes, _layouts, etc.) contain files and code for the Jekyll site and theme.
How to Add a New Page
To add a new page, go to your repository’s main branch and click “Add file” in the top-right corner and click “Create a new file.”
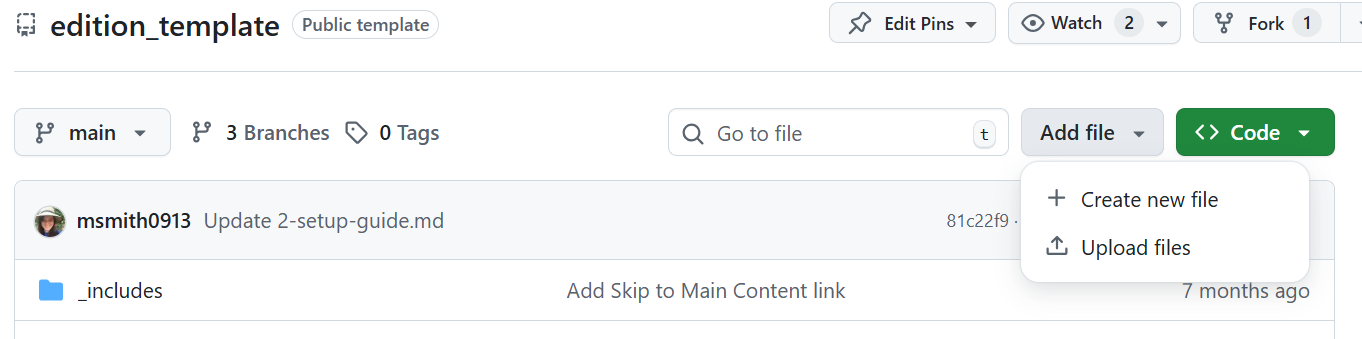
You can also upload a file from your computer by clicking “Upload files” and selecting the file you want to upload.
Note: If you’d like to add a file to a main folder or subfolder, you can do so by locating and opening that folder. If you need to create a new folder for that file, clickhere. for step-by-step instructions.
If you are manually adding a new file, make sure to title that file and save using the correct file extension, e.g., Markdown (.md) or TEI (.xml).
Remember to add a period ( . ) before the file extension to ensure it saves correctly. See Naming Your Project.
How to Create a New Folder
To create a new folder, you first must create or upload the file you’d like to store in the new folder, see above on how to create or upload new files.
After your file has been uploaded either to the main branch or to the desired nested folder, click on the file to open it.
Next, switch to edit mode by clicking the pencil icon in the top-right corner.
At the top of the page, you’ll see an option to update the file name, insert a forward slash ( / ) followed by the new folder name.
IMAGE
You can also create a nested folder within this new folder by adding another forward slash ( / ) followed by the new nested folder name.
IMAGE
Click “Commit Changes” to save.
Transcribing and Editing
For detailed documentation on transcribing sources, organizing files, and preparing your edition for online publication, see our Markdown Guide or visit the Markdown to review thier super helpful cheat sheet.
If you plan to use TEI in your edition, you may also link directly to the Recovery Hub’s TEI Guide.
Troubleshooting
If you’re experiencing problems with your GitHub Pages site, the official GitHub Pages documentation has detailed troubleshooting information and is a good place to start.